Nowadays, having a website is essential for individuals and also for businesses. Creating a website is actually not as rocket science as you might think.. there are user-friendly tools available that can help you achieve this regardless of your skill level.
Having a website for your Facebook page can be important for several reasons and advantages:
- Expanded Online Presence & Broader Reach
- Legitimacy and Credibility
- Control and Customization
- Business Growth and Monetization
- Data Collection and Analytics
If you want to create a website for your Facebook page, well, that’s pretty easy, in this article we’re gonna share with you 2 methods you can actually follow to create your site, the first one is easier.. if you are not familiar with websites creation and all the related stuff, we suggest that you go with it (using a website builder), the second one is using WordPress, which is a kinda advanced method and especially if you want a very custom website and more control over your site.
Difficulty: Easy (step by step).
Method 1: Using a website builder
This one is easier as we said earlier. Nicepage is a user-friendly website builder designed to simplify the process of creating beautiful and simple websites. You can have yours in just minutes.
Step #1: Choose your template
Go to nicepage → templates, write your keyword in the textbox, for example, “insurance”, a lot of website templates will appear, browse and choose the one that suits you, and then click edit online.
Now you’ll need to create an account.
Step #2: Customize your site
Start customizing your template using Nicepage’s intuitive drag-and-drop editor (edit text, images, colors, and layout styles, and add/remove blocks headers footers forms.. as you like to match your preferences).
Preview your website to make sure everything looks as you have in mind.
Step #3: Launch your site
Once satisfied with your site, click Publish to make your site live on the internet.
PS: Nicepage offers free plans and paid plans, but the free plans can be enough for you as a beginner.
Method 2: Using WordPress
WordPress is a more advanced solution and powerful CMS “content management system” platform that allows for more advanced customization for various types of websites, from simple blogs, media galleries, and membership sites, to e-commerce stores.. and all of this using ready-to-use templates, you don’t have to code anything.
Step #1: Set up WordPress
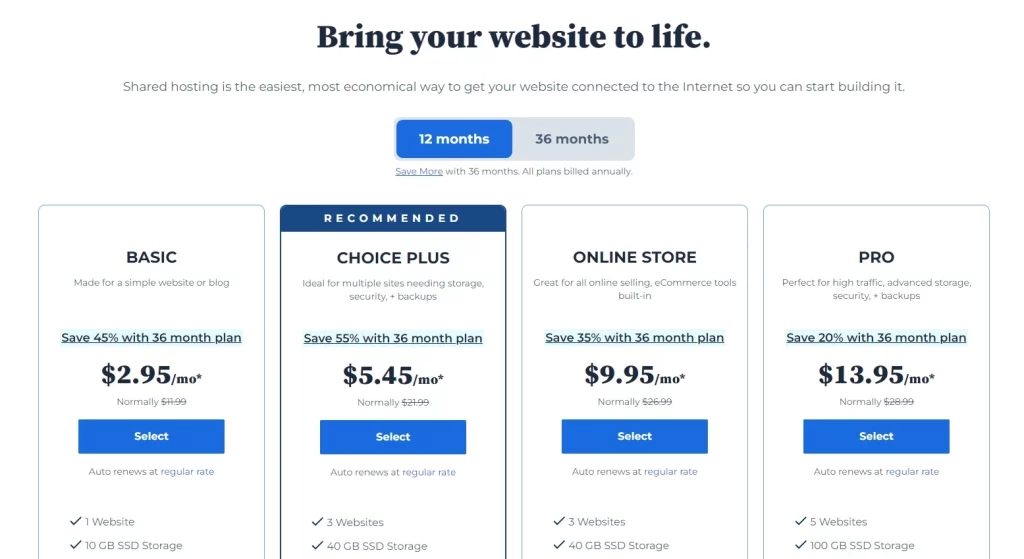
Buy a web hosting service and a domain name for your site, services like Bluehost, Namecheap, and HostGator offer a 1 click WordPress installation, and their basic plans prices are not very expensive.
- Go to Bluehost
- Select the basic plan to start with
- Choose a new domain name or use an existing one of yours
- Enter your account information and payment information
- Complete the registration process
- Log in to your Bluehost account
- go to “My sites”
- Click “Create site”
- Choose WordPress
- Enter your site Name (this can be changed anytime later)
- Select your domain name
- Click “Install” and that’s it
Conclusion
Whether you go with the simplicity of Nicepage or the advanced option of WordPress, creating a simple website has become easier.
Once your website is live, you might want to add a link to it on your Facebook page:
- Access your Facebook page
- Edit your page information
- Update the page’s contact info
- Add the link to your site
- Click Save